Investment Casting Strength – Part 1: The basics
Hello everyone, as part of my new and exciting role within Remet®, I thought I would take some time to discuss some of the intricacies of some of the testing carried out both on your own sites and here within our Rochester facility. Strength is always a key parameter we review and analyse periodically and it is extremely important to the success of a process. Therefore, it is also important to understand when we discuss strength, what is happening in the material, what the results mean and how to improve or change this parameter to improve our process.
When people talk about strength of wax or shells, the underlying principles are sometime misunderstood or misused. Within this piece I would like to discuss the underlying principles and aspects of what we call strength in the context of both wax and shell materials. Luckily the fundamental principles of strength do no differ between these materials, however the results and conclusions we can draw can differ. Within this section we will discuss the strength measurement technique, the mechanics involved and what data we can extract from the testing.
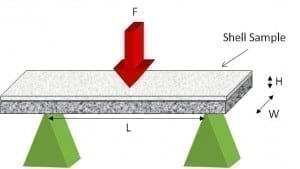
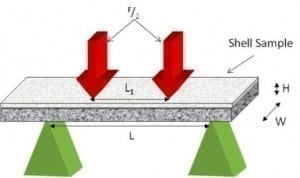
The primary method of measuring method for strength is 3 or 4 point bending, the difference between the methods is that the 4 point bending distributes force over a larger area. Figure 1 shows the setup and force distributions for each method. 4 point bend testing measures over a larger area and therefore it can assess the largest failure flaw present between the loading forces. As a result it generally gives a lower value of MOR.
Other methods have also been reviewed and used to measure strength including the Edge test (Hyde, 1995) for trailing edges and also a cylindrical test method (Okhuysen, 2011)
 |
 |
 |
 |
|
(a) |
(b) |
Figure 1: 3 & 4 point bend test setups and stress distributions
It has been argued in various articles (Richards, 2001 & Hahn, 2003) that 4 point bend is a better method however 3 point bending is equally sufficient for measuring strength also and can be easier to use on uneven surfaces such as shells.
In both cases, it is worth reviewing what happens inside a material when it is loaded as it is extremely important to understand what this means for our results. During loading in 3 & 4 point bending, the material, there are opposing forces at work. Due to undergoing a bending stress applied by the force, the material goes into both tension and compression. This is summarised in figure 2.
Figure 2: Tension and compression within a material under loading
Assuming the material is homogeneous, the change from compression to tension will change 50% through the material, with the neutral axis @ 50% thickness experience zero bending stress.
The strength measurement typically called MOR (Modulus of Rupture) or fracture strength, as the property which is predominantly discussed. The equations for this method are very straightforward and was devised by Euler in the 1730s.
 |
|
 |
|
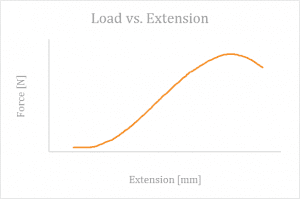
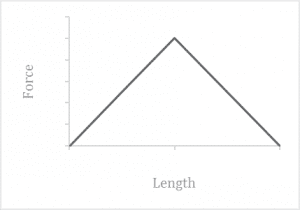
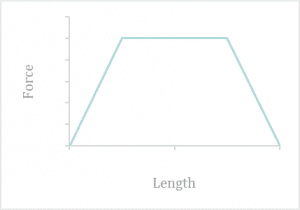
Where P is the Force, W is the width of your sample and H is the thickness and L is the span between where you are testing. The width and thickness can be measured at the fracture site and it is advised multiple measurements are taken to reduce error. However, MOR is not the only parameter which can be measured and analysed when carrying out flexural testing a typical testing setup will also output the force vs. extension curve as per figure 3.
Figure 3: Typical force vs. extension curve
The parameters calculated from this curve can be a wealth of information and insight into the material and vary greatly from wax to shell. These will be discussed in the next edition so stay tuned…
References
Richards,VL. R V Wolf, and G. Connin, Four Point Bend Testing to Characterise the Strength of Ceramic Mold Shells in 49th ICI Technical Conference. 2001: Orlando , Florida.
Hahn, T., Statistical Analysis of Three-point & Four-point Bend Testing for the Characterization of Ceramic Mold Shells, in 51st ICI Technical Conference. 2003: Cleveland
Hyde, R., S. Leyland, and S. Jones. Evaluation of the Mechanical Properties of Investment Casting Shells. in 22nd BICTA Technical Conference. 1995. Bath, UK
Okhuysen, V., Introduction of Cylindrical MOR Test Specimen, in 58th Technical ICI Conference. 2011: Covington, KY.
< Back to insights
